Django Models
Django Tutorial Using models
- Django web applications access and manage data through Python objects referred to as models. Models define the structure of stored data, including the field types and possibly also their maximum size, default values, selection list options, help text for documentation, label text for forms, etc. The definition of the model is independent of the underlying database — you can choose one of several as part of your project settings. Once you’ve chosen what database you want to use, you don’t need to talk to it directly at all — you just write your model structure and other code, and Django handles all the dirty work of communicating with the database for you.
Designing the LocalLibrary models
-
Before you jump in and start coding the models, it’s worth taking a few minutes to think about what data we need to store and the relationships between the different objects.
-
We know that we need to store information about books (title, summary, author, written language, category, ISBN) and that we might have multiple copies available (with globally unique id, availability status, etc.). We might need to store more information about the author than just their name, and there might be multiple authors with the same or similar names. We want to be able to sort information based on book title, author, written language, and category.
-
When designing your models it makes sense to have separate models for every “object” (a group of related information). In this case, the obvious objects are books, book instances, and authors.
-
You might also want to use models to represent selection-list options (e.g. like a drop down list of choices), rather than hard coding the choices into the website itself — this is recommended when all the options aren’t known up front or may change. Obvious candidates for models, in this case, include the book genre (e.g. Science Fiction, French Poetry, etc.) and language (English, French, Japanese).
-
Once we’ve decided on our models and field, we need to think about the relationships. Django allows you to define relationships that are one to one (OneToOneField), one to many (ForeignKey) and many to many (ManyToManyField).
-
With that in mind, the UML association diagram below shows the models we’ll define in this case (as boxes).
-
We’ve created models for the book (the generic details of the book), book instance (status of specific physical copies of the book available in the system), and author. We have also decided to have a model for the genre so that values can be created/selected through the admin interface. We’ve decided not to have a model for the BookInstance:status — we’ve hardcoded the values (LOAN_STATUS) because we don’t expect these to change. Within each of the boxes, you can see the model name, the field names, and types, and also the methods and their return types.
-
The diagram also shows the relationships between the models, including their multiplicities. The multiplicities are the numbers on the diagram showing the numbers (maximum and minimum) of each model that may be present in the relationship. For example, the connecting line between the boxes shows that Book and a Genre are related. The numbers close to the Genre model show that a book must have one or more Genres (as many as you like), while the numbers on the other end of the line next to the Book model show that a Genre can have zero or many associated books.
Model definition
- Models are usually defined in an application’s models.py file. They are implemented as subclasses of django.db.models.Model, and can include fields, methods and metadata. The code fragment below shows a “typical” model, named MyModelName:
from django.db import models

class MyModelName(models.Model):
    """A typical class defining a model, derived from the Model class."""

    # Fields
    my_field_name = models.CharField(max_length=20, help_text='Enter field documentation')
    ...

    # Metadata
    class Meta:
        ordering = ['-my_field_name']

    # Methods
    def get_absolute_url(self):
        """Returns the url to access a particular instance of MyModelName."""
        return reverse('model-detail-view', args=[str(self.id)])

    def __str__(self):
        """String for representing the MyModelName object (in Admin site etc.)."""
        return self.my_field_name
Fields
- A model can have an arbitrary number of fields, of any type — each one represents a column of data that we want to store in one of our database tables. Each database record (row) will consist of one of each field value. Let’s look at the example seen below:
my_field_name = models.CharField(max_length=20, help_text='Enter field documentation')
- Our above example has a single field called my_field_name, of type models.CharField — which means that this field will contain strings of alphanumeric characters. The field types are assigned using specific classes, which determine the type of record that is used to store the data in the database, along with validation criteria to be used when values are received from an HTML form (i.e. what constitutes a valid value). The field types can also take arguments that further specify how the field is stored or can be used. In this case we are giving our field two arguments:
max_length=20 — States that the maximum length of a value in this field is 20 characters.
help_text=’Enter field documentation’ — provides a text label to display to help users know what value to provide when this value is to be entered by a user via an HTML form.
-
The field name is used to refer to it in queries and templates. Fields also have a label specified as an argument (verbose_name), the default value of which is None, meaning replacing any underscores in the field name with a space (for example my_field_name would have a default label of my field name). Note that when the label is used as a form label through Django frame, the first letter of the label is capitalised (for example my_field_name would be My field name).
-
The order that fields are declared will affect their default order if a model is rendered in a form (e.g. in the Admin site), though this may be overridden.
Metadata
- You can declare model-level metadata for your Model by declaring class Meta, as shown.
class Meta:
    ordering = ['-my_field_name']
- One of the most useful features of this metadata is to control the default ordering of records returned when you query the model type. You do this by specifying the match order in a list of field names to the ordering attribute, as shown above. The ordering will depend on the type of field (character fields are sorted alphabetically, while date fields are sorted in chronological order). As shown above, you can prefix the field name with a minus symbol (-) to reverse the sorting order.
So as an example, if we chose to sort books like this by default:
ordering = ['title', '-pubdate']
the books would be sorted alphabetically by title, from A-Z, and then by publication date inside each title, from newest to oldest.
Another common attribute is verbose_name, a verbose name for the class in singular and plural form:
verbose_name = 'BetterName'
-
Other useful attributes allow you to create and apply new “access permissions” for the model (default permissions are applied automatically), allow ordering based on another field, or to declare that the class is “abstract” (a base class that you cannot create records for, and will instead be derived from to create other models).
-
Many of the other metadata options control what database must be used for the model and how the data is stored (these are really only useful if you need to map a model to an existing database).
Methods
-
A model can also have methods.
-
Minimally, in every model you should define the standard Python class method
__str__()to return a human-readable string for each object. This string is used to represent individual records in the administration site (and anywhere else you need to refer to a model instance). Often this will return a title or name field from the model.
def __str__(self):
    return self.field_name
- Another common method to include in Django models is get_absolute_url(), which returns a URL for displaying individual model records on the website (if you define this method then Django will automatically add a “View on Site” button to the model’s record editing screens in the Admin site). A typical pattern for get_absolute_url() is shown below.
def get_absolute_url(self):
    """Returns the url to access a particular instance of the model."""
    return reverse('model-detail-view', args=[str(self.id)])
Model management
- Once you’ve defined your model classes you can use them to create, update, or delete records, and to run queries to get all records or particular subsets of records. We’ll show you how to do that in the tutorial when we define our views, but here is a brief summary.
Creating and modifying records
- To create a record you can define an instance of the model and then call save().
# Create a new record using the model's constructor.
record = MyModelName(my_field_name="Instance #1")

# Save the object into the database.
record.save()
- You can access the fields in this new record using the dot syntax, and change the values. You have to call save() to store modified values to the database.
# Access model field values using Python attributes.
print(record.id) # should return 1 for the first record.
print(record.my_field_name) # should print 'Instance #1'

# Change record by modifying the fields, then calling save().
record.my_field_name = "New Instance Name"
record.save()
Searching for records
-
You can search for records that match certain criteria using the model’s objects attribute (provided by the base class).
-
Note: Explaining how to search for records using “abstract” model and field names can be a little confusing. In the discussion below we’ll refer to a Book model with title and genre fields, where genre is also a model with a single field name.
-
We can get all records for a model as a QuerySet, using objects.all(). The QuerySet is an iterable object, meaning that it contains a number of objects that we can iterate/loop through.
all_books = Book.objects.all()
- Django’s filter() method allows us to filter the returned QuerySet to match a specified text or numeric field against particular criteria. For example, to filter for books that contain “wild” in the title and then count them, we could do the following.
wild_books = Book.objects.filter(title__contains='wild')
number_wild_books = wild_books.count()
Django Tutorial admin site
- The Django admin application can use your models to automatically build a site area that you can use to create, view, update, and delete records. This can save you a lot of time during development, making it very easy to test your models and get a feel for whether you have the right data. The admin application can also be useful for managing data in production, depending on the type of website. The Django project recommends it only for internal data management (i.e. just for use by admins, or people internal to your organization), as the model-centric approach is not necessarily the best possible interface for all users, and exposes a lot of unnecessary detail about the models.
Registering models
- First, open
admin.pyin the catalog application (/locallibrary/catalog/admin.py). It currently looks like this — note that it already imports django.contrib.admin:
from django.contrib import admin

# Register your models here.
Register the models by copying the following text into the bottom of the file. This code imports the models and then calls admin.site.register to register each of them.
from .models import Author, Genre, Book, BookInstance

admin.site.register(Book)
admin.site.register(Author)
admin.site.register(Genre)
admin.site.register(BookInstance)
-
Note: If you accepted the challenge to create a model to represent the natural language of a book (see the models tutorial article), import and register it too!
-
This is the simplest way of registering a model, or models, with the site. The admin site is highly customisable, and we’ll talk more about the other ways of registering your models further down.
Creating a superuser
-
In order to log into the admin site, we need a user account with Staff status enabled. In order to view and create records we also need this user to have permissions to manage all our objects. You can create a “superuser” account that has full access to the site and all needed permissions using manage.py.
-
Call the following command, in the same directory as manage.py, to create the superuser. You will be prompted to enter a username, email address, and strong password.
python3 manage.py createsuperuser
Once this command completes a new superuser will have been added to the database. Now restart the development server so we can test the login:
python3 manage.py runserver
Logging in and using the site
-
To login to the site, open the /admin URL (e.g.
http://127.0.0.1:8000/admin) and enter your new superuser userid and password credentials (you’ll be redirected to the login page, and then back to the /admin URL after you’ve entered your details). -
This part of the site displays all our models, grouped by installed application. You can click on a model name to go to a screen that lists all its associated records, and you can further click on those records to edit them. You can also directly click the Add link next to each model to start creating a record of that type.
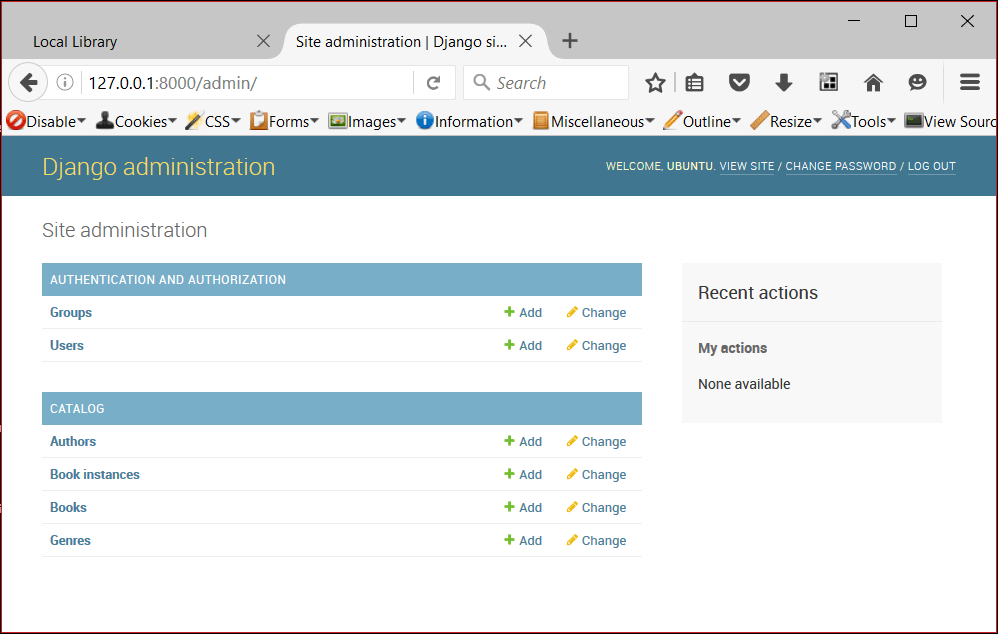
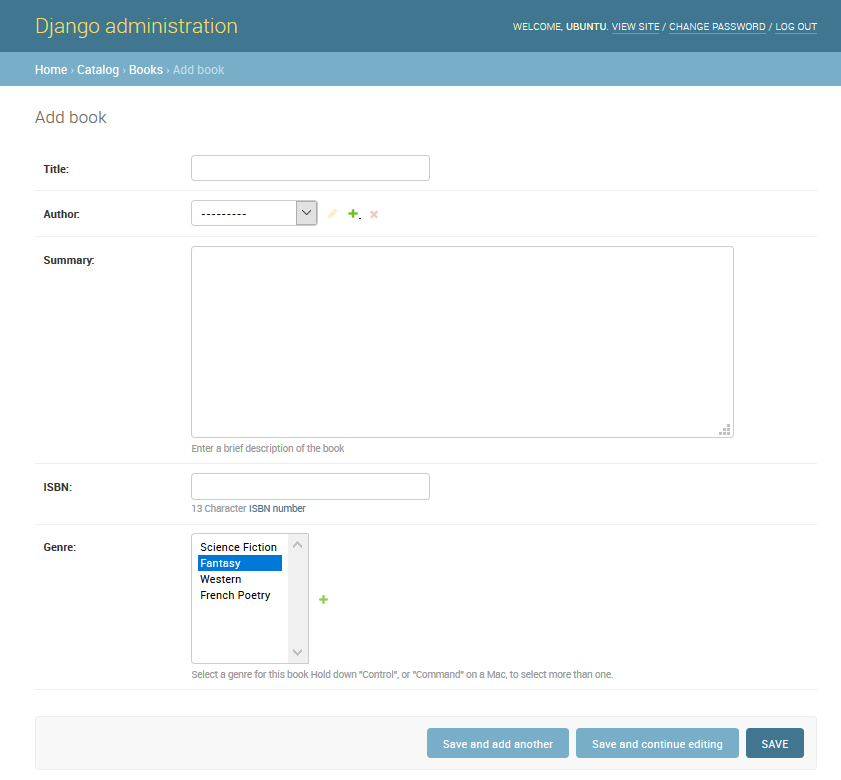
Click on the Add link to the right of Books to create a new book (this will display a dialog much like the one below). Note how the titles of each field, the type of widget used, and the help_text (if any) match the values you specified in the model.
Enter values for the fields. You can create new authors or genres by pressing the + button next to the respective fields (or select existing values from the lists if you’ve already created them). When you’re done you can press SAVE, Save and add another, or Save and continue editing to save the record.
Note: At this point we’d like you to spend some time adding a few books, authors, and genres (e.g. Fantasy) to your application. Make sure that each author and genre includes a couple of different books (this will make your list and detail views more interesting when we implement them later on in the article series).
When you’ve finished adding books, click on the Home link in the top bookmark to be taken back to the main admin page. Then click on the Books link to display the current list of books (or on one of the other links to see other model lists). Now that you’ve added a few books, the list might look similar to the screenshot below. The title of each book is displayed; this is the value returned in the Book model’s __str__() method that we specified in the last article.
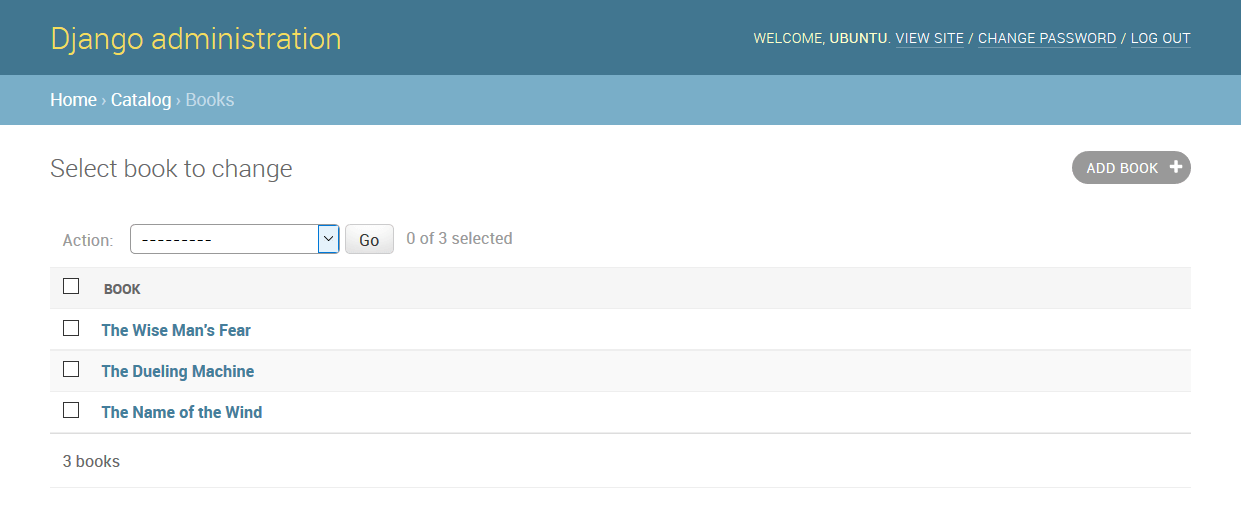
From this list you can delete books by selecting the checkbox next to the book you don’t want, selecting the delete… action from the Action drop-down list, and then pressing the Go button. You can also add new books by pressing the ADD BOOK button.
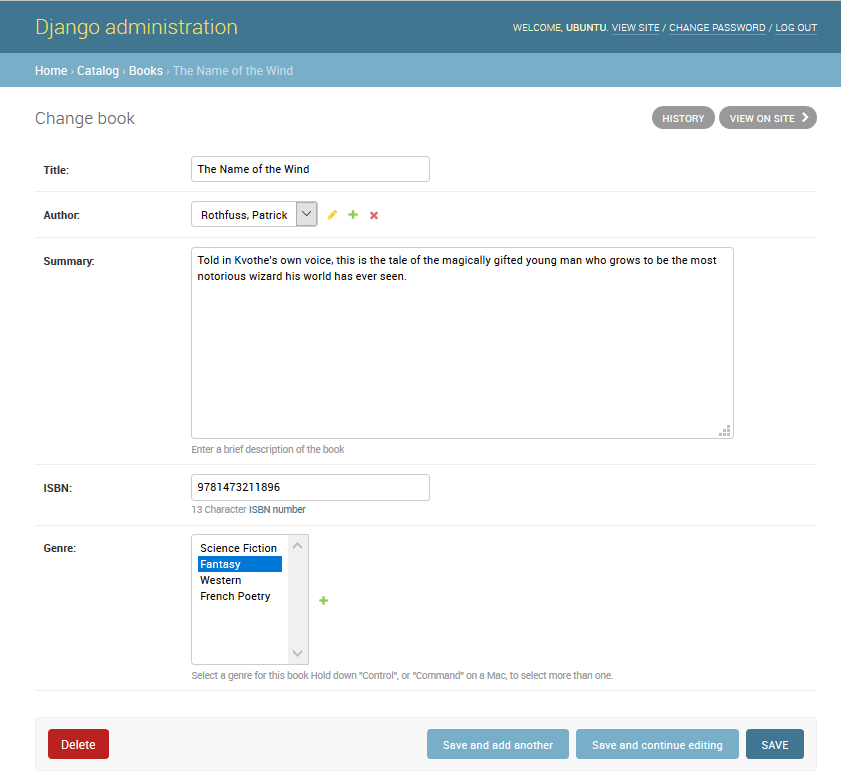
You can edit a book by selecting its name in the link. The edit page for a book, shown below, is almost identical to the “Add” page. The main differences are the page title (Change book) and the addition of Delete, HISTORY and VIEW ON SITE buttons (this last button appears because we defined the get_absolute_url() method in our model).
Now navigate back to the Home page (using the Home link in the breadcrumb trail) and then view the Author and Genre lists — you should already have quite a few created from when you added the new books, but feel free to add some more.
What you won’t have is any Book Instances, because these are not created from Books (although you can create a Book from a BookInstance — this is the nature of the ForeignKey field). Navigate back to the Home page and press the associated Add button to display the Add book instance screen below. Note the large, globally unique Id, which can be used to separately identify a single copy of a book in the library.
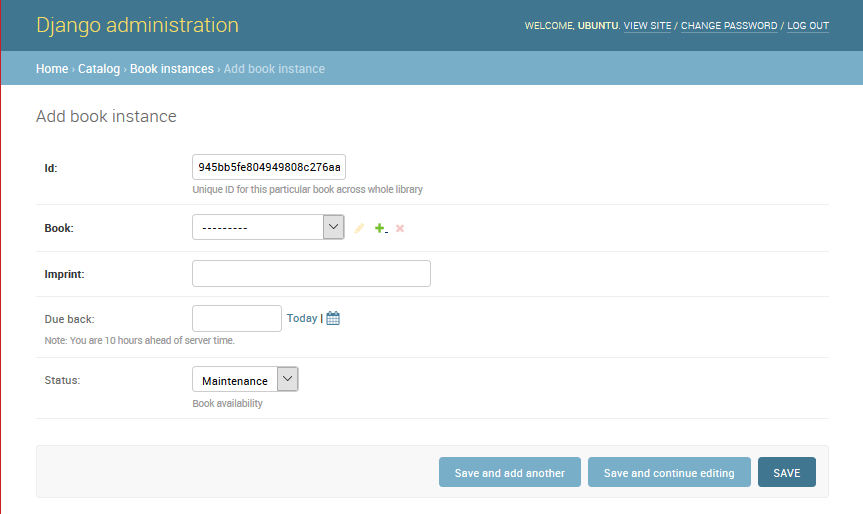
Create a number of these records for each of your books. Set the status as Available for at least some records and On loan for others. If the status is not Available, then also set a future Due back date.
That’s it! You’ve now learned how to set up and use the administration site. You’ve also created records for Book, BookInstance, Genre, and Author that we’ll be able to use once we create our own views and templates.